Day 8 - Rigging / Importing
Sizing
So far we’ve only tried to make an object’s look correct when compared to other objects. But what if you create a sofa that is 50 feet long, and scale the whole house according to that? Or make it an inch long? Making objects to the wrong scale can run into issues later when we import/export objects across different scenes, when we add lighting, textures, and add physics simulations.
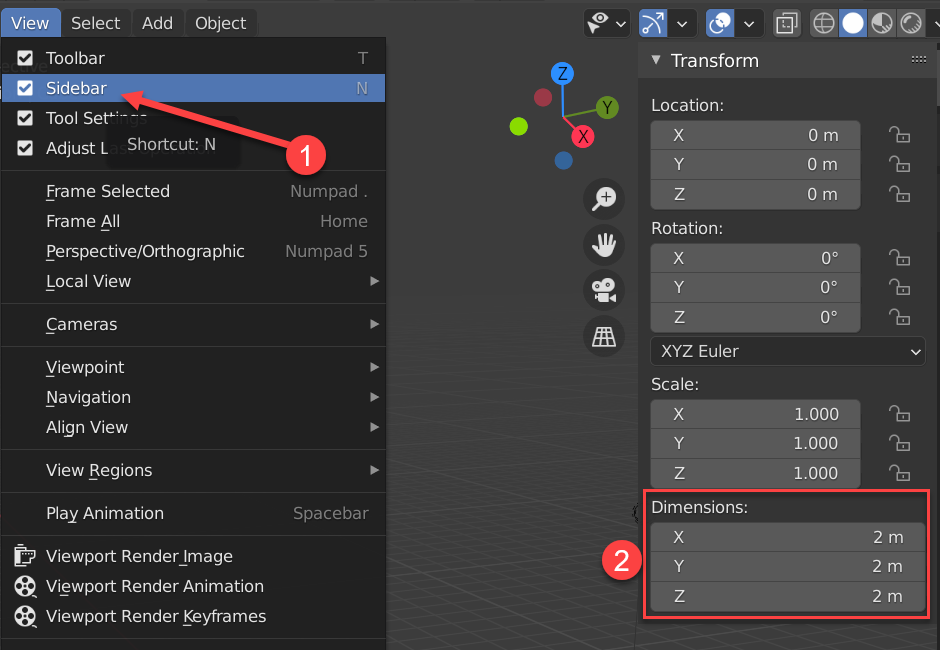
How do we get an idea how big our object is? A quick way is to open the sidebar and see the object’s dimensions. Here we can see out object is 2x2x2 meters.
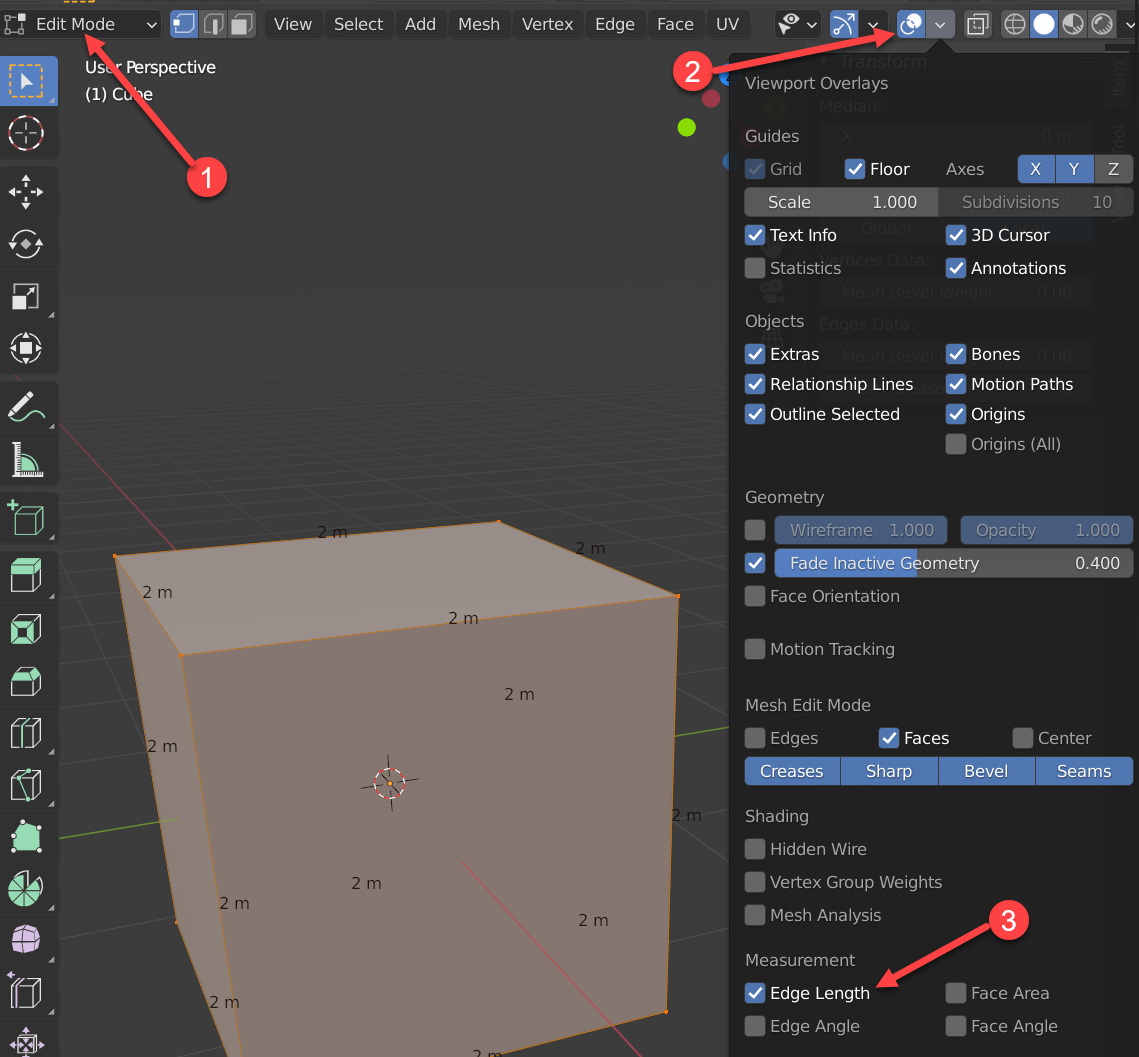
That’s just a rough guide though. Need more details? Switch to ‘Edit Mode’ (1) then pull down the ‘Show Overlays’ menu (2) and finally select ‘Edge Length’ (3). You’ll now see the length of each edge.
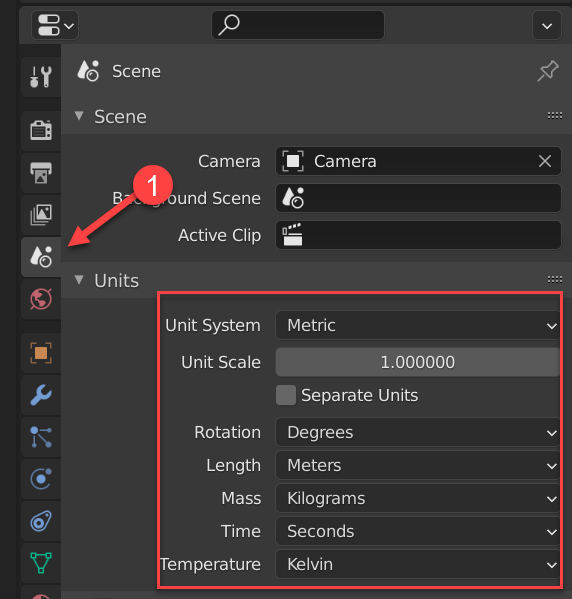
Don’t want to work in meters? No problem! Change your units here:
As you are making a mesh, make sure it is roughly the correct size.
Importing
Objects can be created in separate .blend files, and then imported into
a single file to be rendered. This helps split work between people.
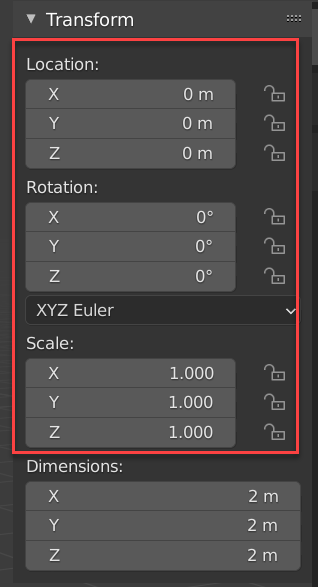
I suggest one .blend file per object. Have the object in the center,
keep the scale, translation, and rotation numbers at zero. Make the dimensions
of the object accurate.
Make sure the objects are named, that will make it easy import.
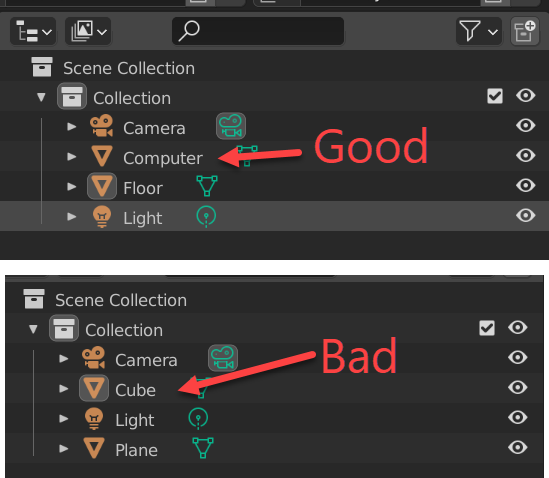
In your main Blender file, to import the object you want to select “Append”. Do not select “import”. Import is used to import from other programs or file formats. Not Blender file formats.
“Link” is very similar. It will bring in the object, but if you update the object in the original file, it will show the updated object. Useful if you are going to revise your object. But hazardous because it requires that linked file to be there.
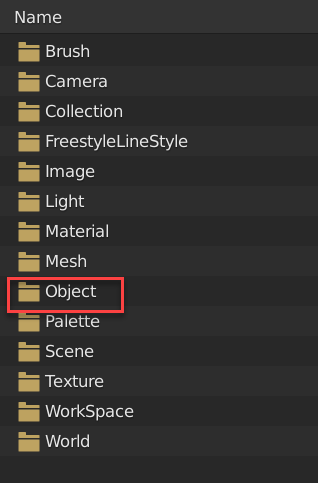
Once you’ve opened the file, you aren’t done! You select what type of item you want to import. You likely want to import from the “object” folder:
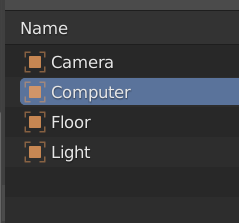
From there, you select the object you want to import:
Blendswap
There are websites like Blend Swap that let you upload and download models. If you download a model, you have to cite it.
Working with a texture
You can download tileable textures from websites like this:
Remember, if you download it, you have to cite it.
I’m going to search on ‘building’ and use ‘Cinder block bricks - design 4’
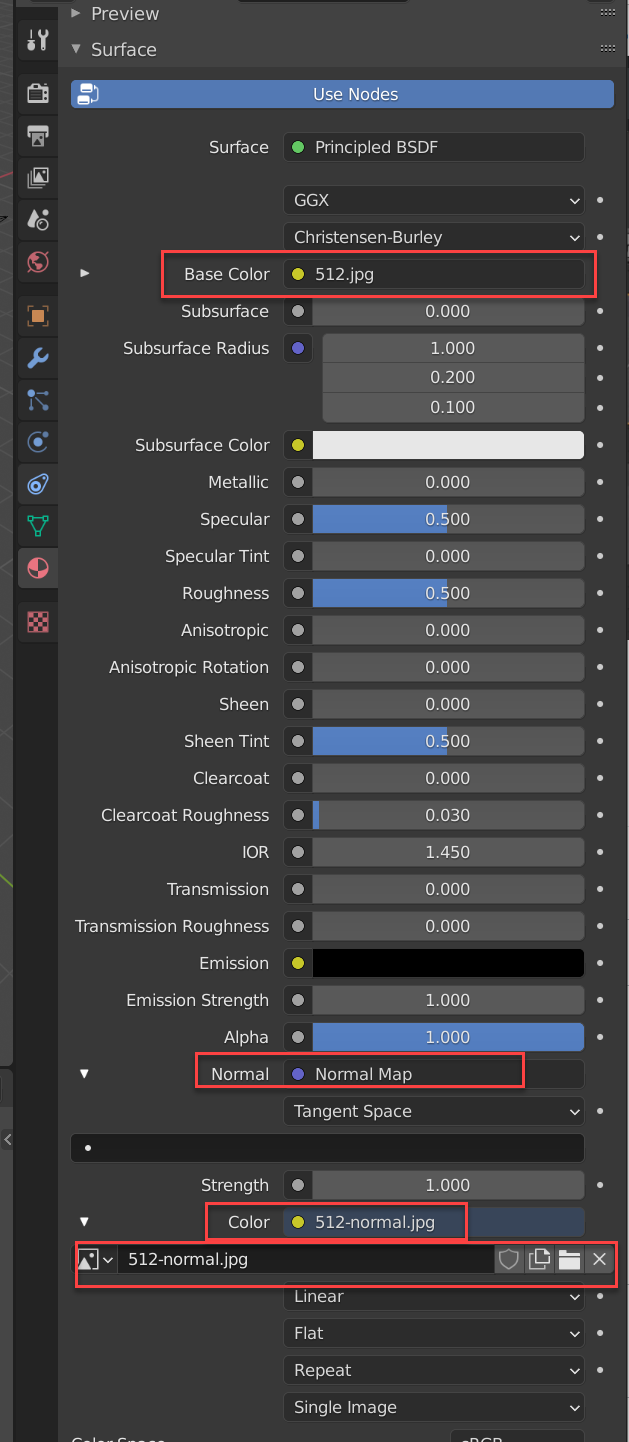
I’ll show how to add the texture to a plane. I’ll also show how to add the normal and scale the texture.
How to Cite Other’s Work
So, you are using downloaded HDRI files? Images? Textures? Models? Want to give credit to that awesome tutorial you found? Start keeping a reference list for your final project. It should be in MLA format and look like this.
Bibliography for Sample Project
These are the resources used in creating Sample Project.
Models
Slobang. “Office Desk With Drawers” Blendswap.com, March 14, 2021, www.blendswap.com/blend/27597. Accessed 11 May 2021.
drThunderbuckle. “Lamp and desk” Blendswap.com, February 10, 2020, www.blendswap.com/blend/24404. Accessed 11 May 2021.
Textures
textures.com. “BrickLargeBlocRks0039” textures.com www.textures.com/download/bricklargeblocks0039/120003. textures.com. n.d. Accessed 11 May 2021.
Tileable.co. “Cinder block bricks - design 4” Tilable.co n.d. Accessed 11 May 2021.
Tutorials
Proffitt, Kenan. “Create a TNT Crate Model in Blender” www.blendernation.com/2017/05/13/create-tnt-crate-model-blender Blender Nation. 13 May, 2017. Accessed 11 May 2021.
Rigging
Instructor will do a quick rigging demo with armatures.
Here is a tutorial on armatures/rigging: https://www.youtube.com/watch?v=cZ3o5tjO51s