Day 7 - Animation
Today we’ll talk about Demo Reels, and learn how to do simple animation.
Demo Reels

A demo reel is a short video production that will showcase your abilities to a potential employer or client. If you want to get into this line of work, start working on a demo reel. Continue to work on projects to add to the demo reel. As you get better, replace weaker sections with stronger artwork.
Here are some demo reels from individuals. Go through some of the demo reels and talk about what they do well.
CG Spectrum has a good article and set of videos on How to Make Your Demo Reel Stand Out. Search on “Student Demo Reels” and explore many others.
You can showcase your work to the CG community:
It isn’t just students. 3D FX companies also have demo reels:
Animation
In this section, we’ll learn basic animation techniques. We’ll learn to move an object around, and see how other object parameters can be modified.
Here’s an example I through together that simply moves some snow people around. It also has an HDRI backdrop which we’ll talk about in a bit.
Outline
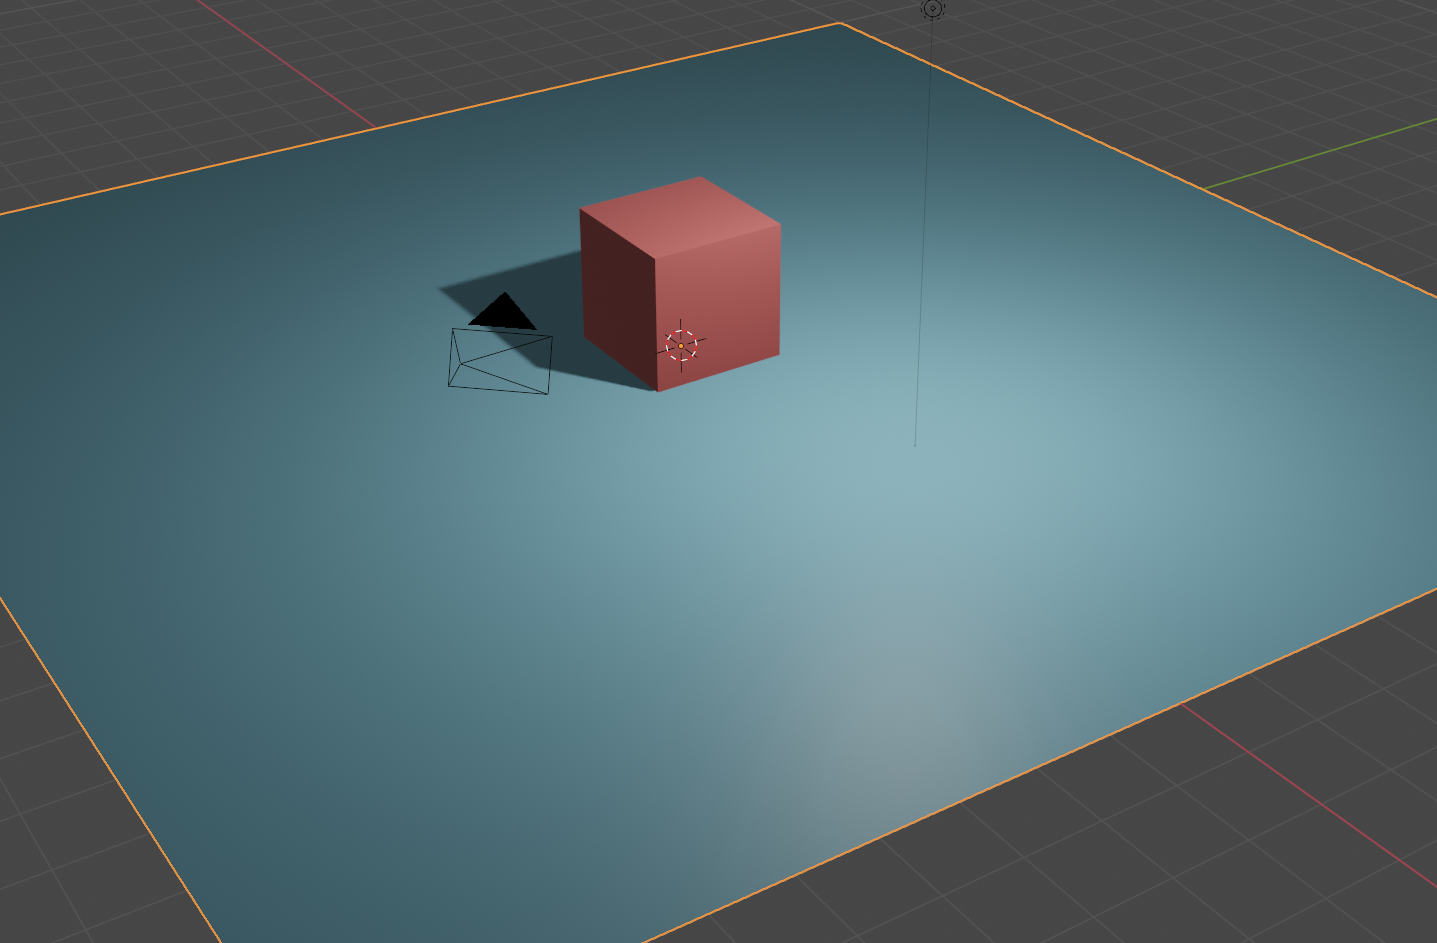
Add a plain, scale it up to be the ground.
Move the cube up one to be on the plain.
Give them different colors. Turn on rendered view.
Move cube along x axis to the edge
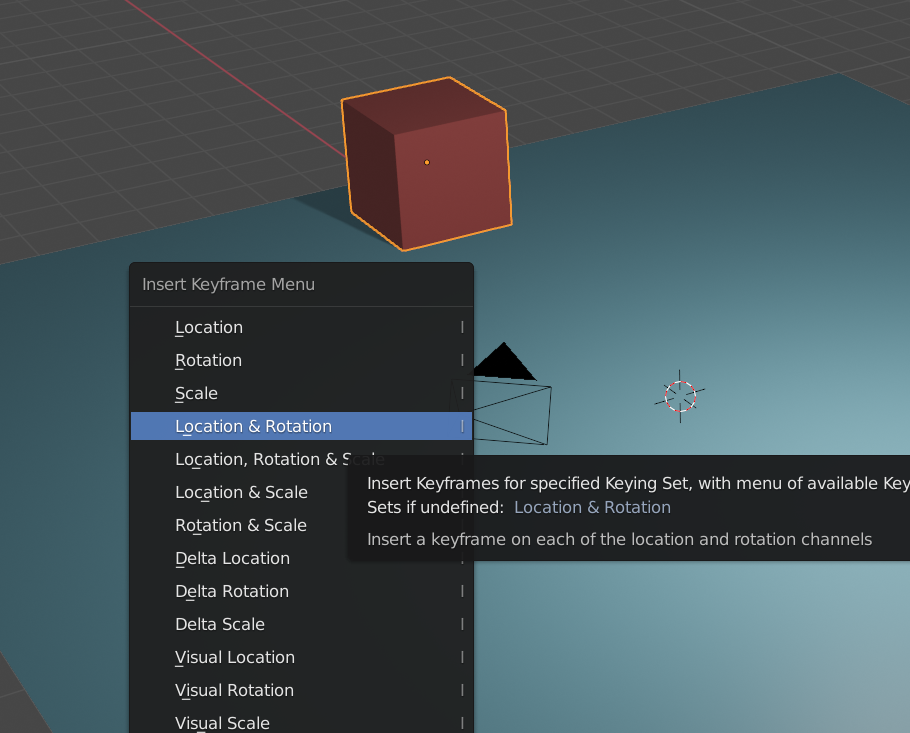
Hit “i” to insert a keyframe. Insert for location and rotation. You must be over the main viewport when you hit “i”.
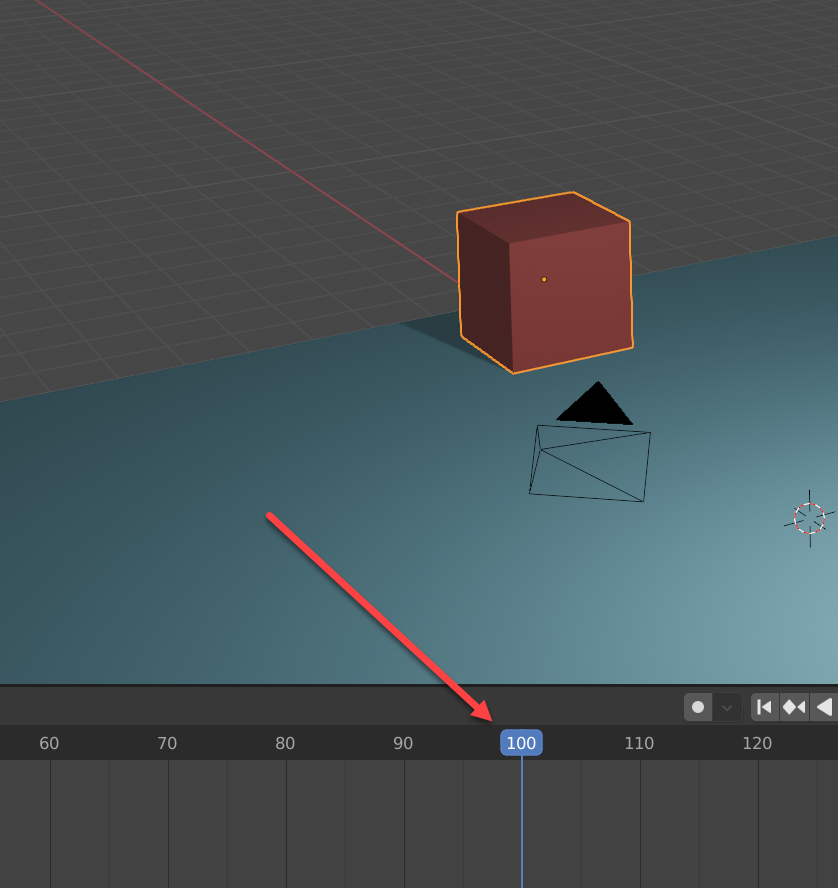
Move to frame 100. You have to do this before you move the object. I often forget, and then have to reposition.
Move the cube alone the y-axis to the center
Insert a new keyframe.
Hit the play button and watch it move.
Try rotating the cube from frames 100-150.
Move to a new spot from 150-250.
Add a different shape and practice animating it.
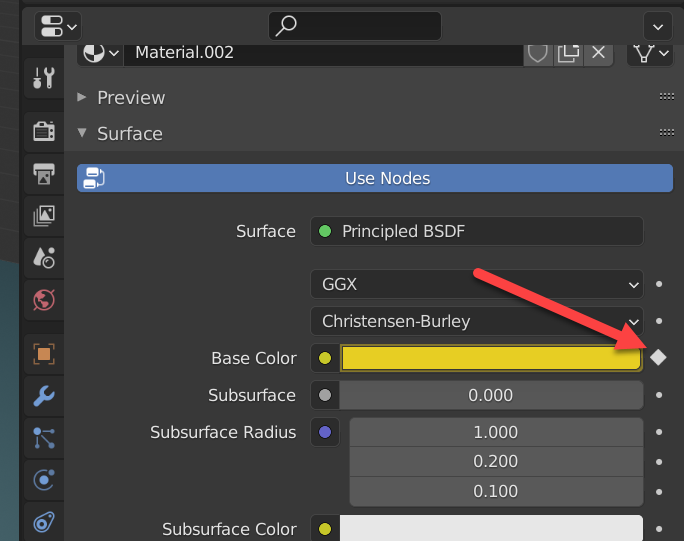
You can animate almost any value. By clicking on this left dot, you can set keyframes for color:
My sample output:
This gives you the basics for animating. Being able to pose characters and animate that way requires learning how to do rigging. We’ll introduce that topic later, but it is too time-consuming for our May term project. Your project should likely stay with simple object movement.
Render Your Movie
Ok, your movie is done. How do you convert it into a movie file? You need to set things like the following:
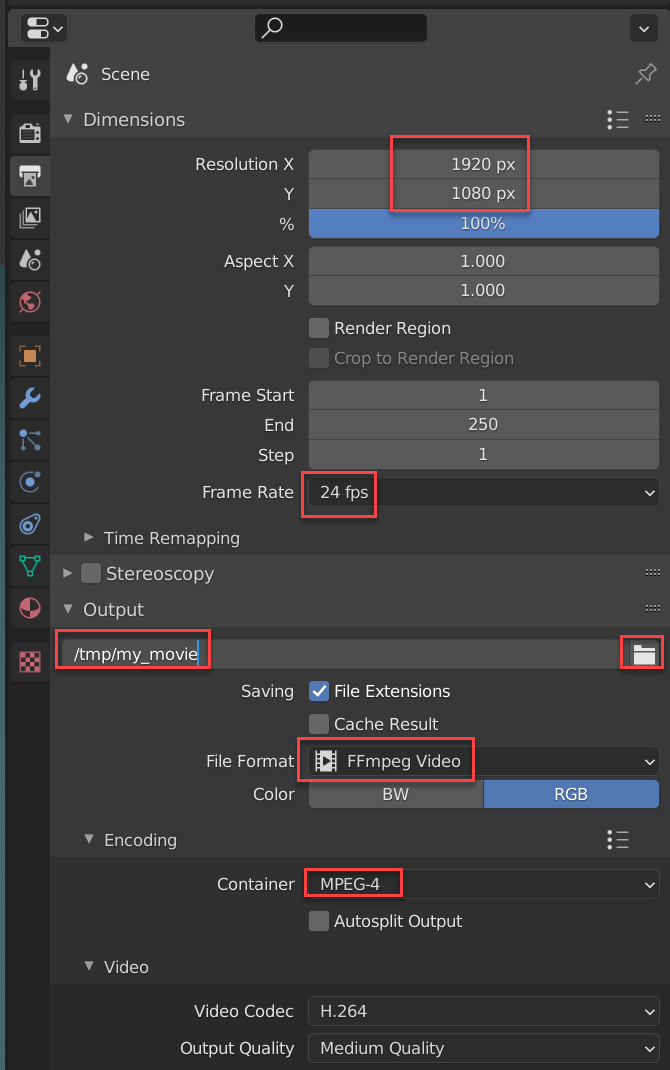
Then select the “Render” menu and do “Render Animation”. It can take a while. If you are using cycles, it can take a crazy-long time.
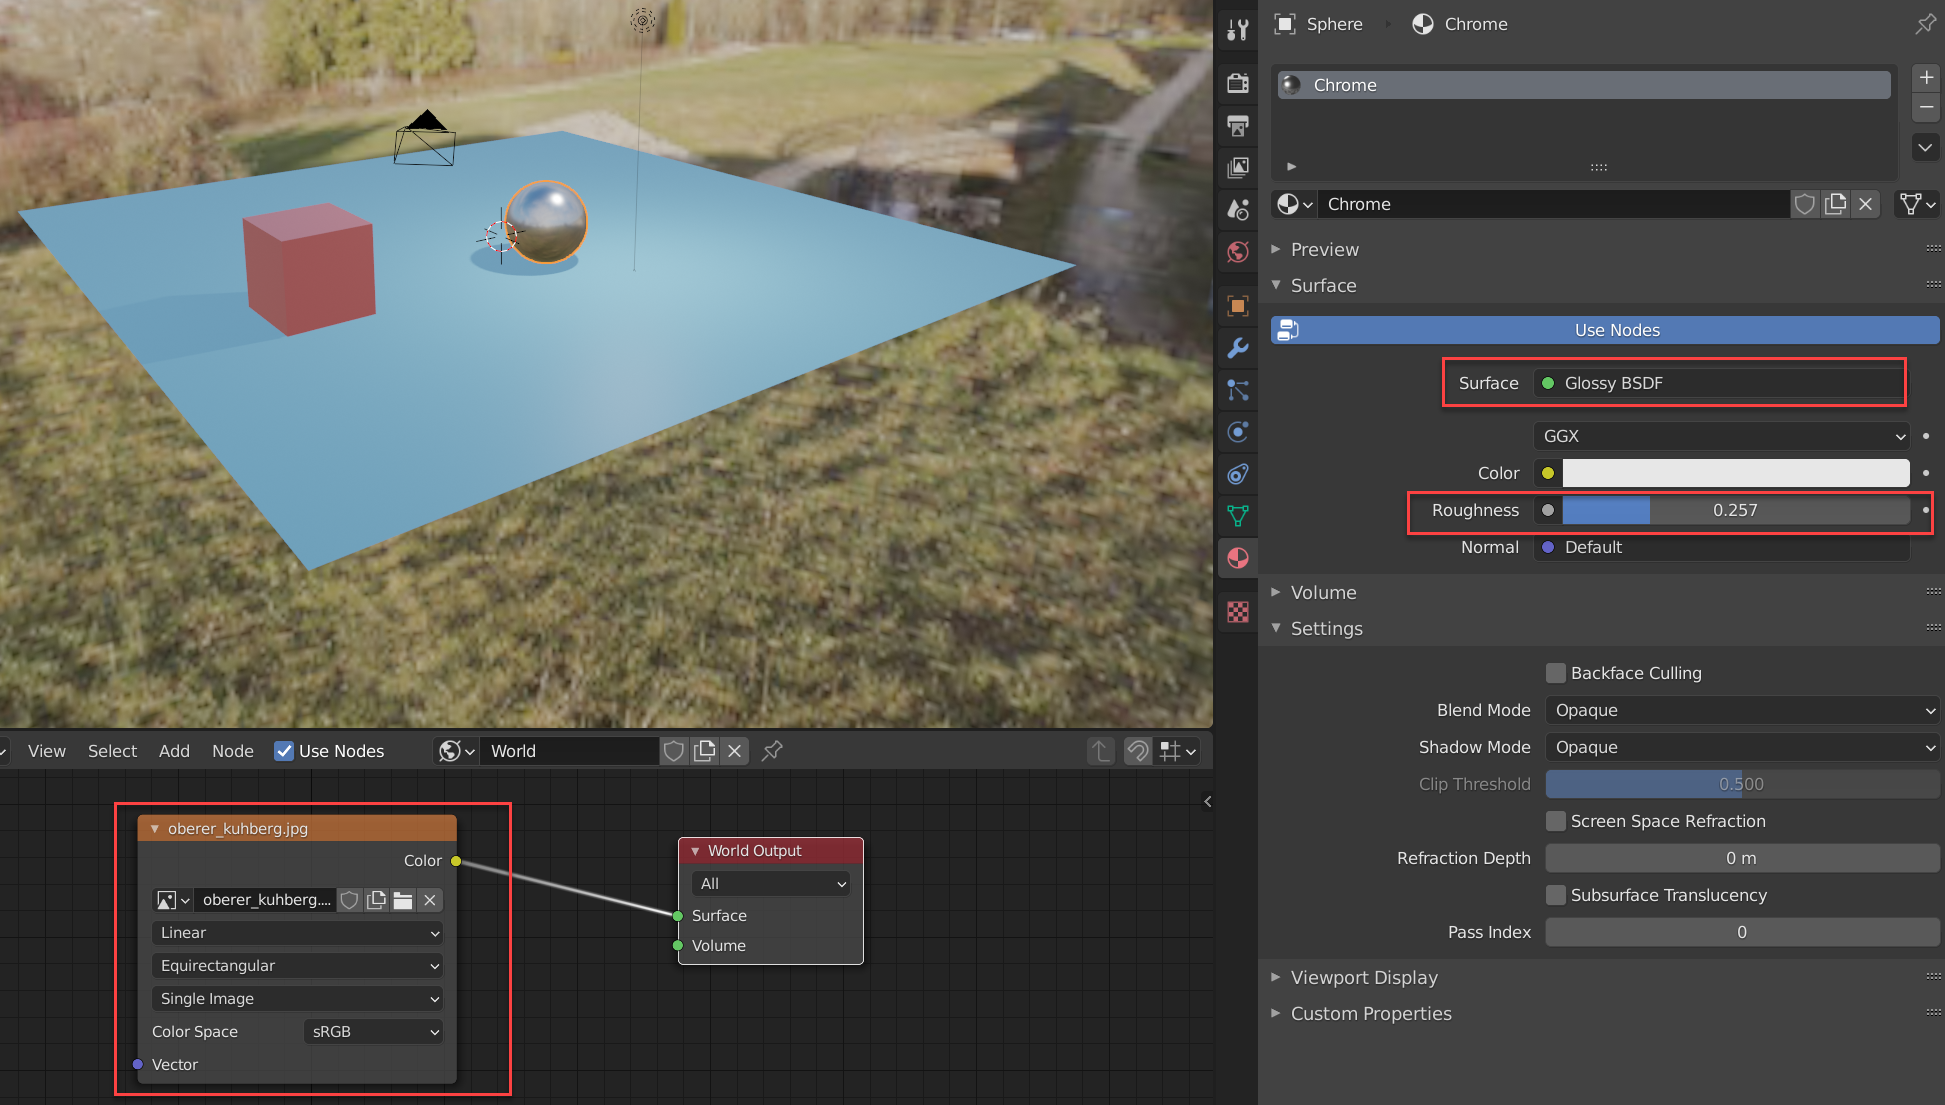
HDRI
Is the gray background bording? You can create a wrap-around image for your project. See these videos:
Today’s Work
Finish your project plan. Talk about it with the instructor. Work on Assignment 7 - Animation.